How to Set Up Delivery Zones (By Drive Time, Not Distance)
A radius circle is the wrong shape for a delivery area. Here is how to design delivery zones by drive time, assign them to drivers, and price each one right.
A delivery zone is the single decision that quietly shapes everything downstream: which orders you accept, which driver gets them, what time window you can promise, and whether the trip makes money. Most businesses draw that zone the fast way — a circle of so many miles or kilometres around the shop — and then spend months absorbing the cost of the orders the circle got wrong. This guide is about drawing zones the honest way: around how far a driver can actually drive in the time you promise, not how far the crow flies. It covers why the circle fails, how to design drive-time zones by hand, how many zones a small fleet should run, whether to charge different fees by zone, and how to build them in Routella.
Why a radius circle is the wrong shape
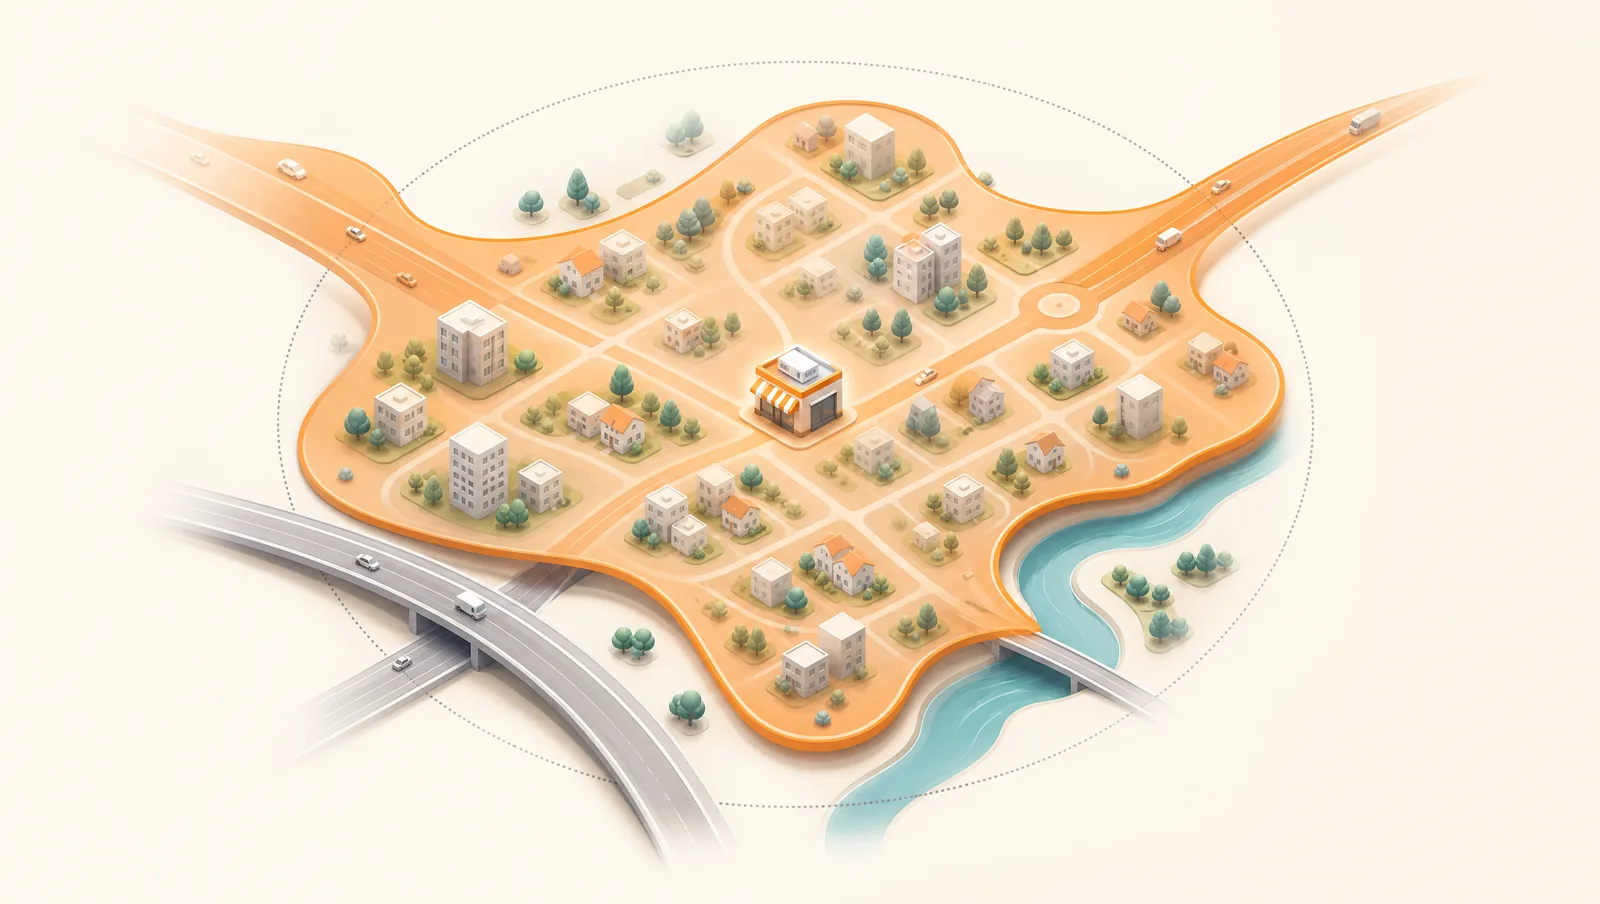
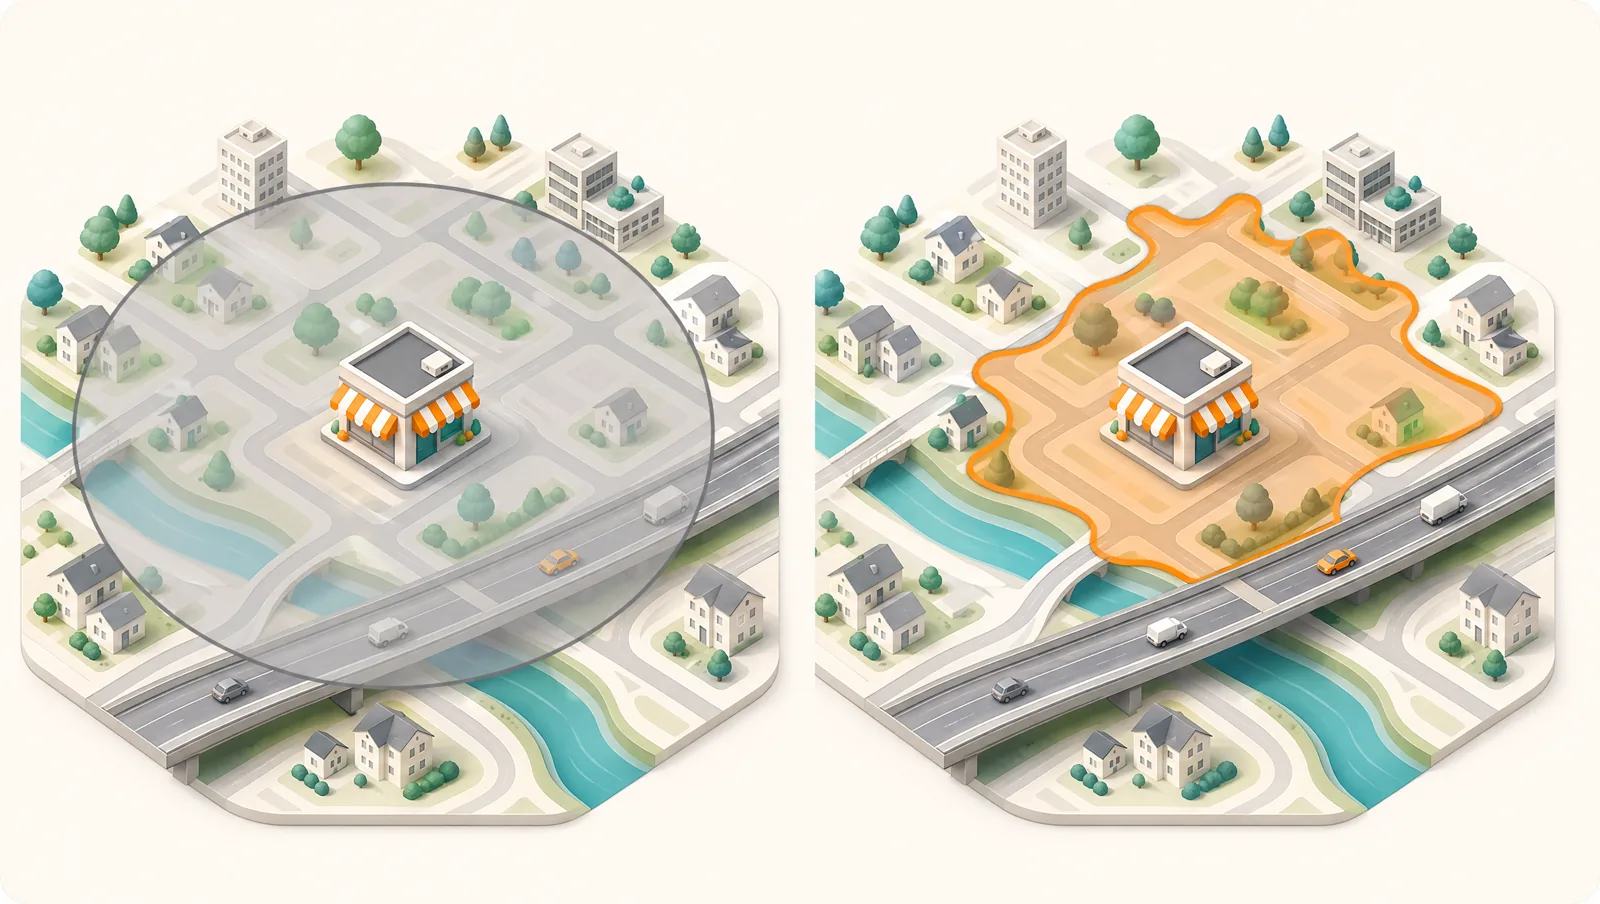
Customers do not travel in circles — they travel on roads. A radius zone assumes the world is flat, empty, and gridless, so it happily includes the far side of a river with no nearby bridge, the gated industrial estate with one entrance, and the neighbourhood the motorway cuts off — while excluding the suburb that is technically a little farther away but sits on a fast arterial road ten minutes from your door. The mismatch is not small. Studies of radius versus real driving distance have found that a majority of the postcodes inside a 5 km circle are not actually within 5 km of driving, with the error still sitting around four-in-ten at the wider bands. In plain terms: draw a circle and you will routinely promise a fast delivery to addresses your driver cannot reach in time, and refuse addresses you could have served profitably.
Distance vs drive time: choose drive time
There are three common ways to define a zone, and they are not equally good. Ranked worst to best for last-mile delivery:
- Radius (a circle). Fastest to set up, least accurate. Fine as a rough first sketch, dangerous as a live boundary.
- Postcode / ZIP or district lists. More honest than a circle because it follows real administrative areas people understand — but a single postcode can straddle a barrier, and large rural codes hide huge distances.
- Drive-time polygon. A custom shape that traces the area your driver can actually reach within a target time (say 20 minutes) on real roads. It is the most accurate boundary and the one that matches what the customer experiences.
- Set the boundary by the clock, not the ruler: "everywhere we can reach in 20 minutes", not "everywhere within 8 km".
- A drive-time shape is irregular and lopsided — that is the point. It bulges along fast roads and pinches at barriers, exactly like real journeys.
- When in doubt, combine: a tight radius for the dense core you can always serve, plus a drive-time shape for the realistic outer edge.
How to design your delivery zones, step by step
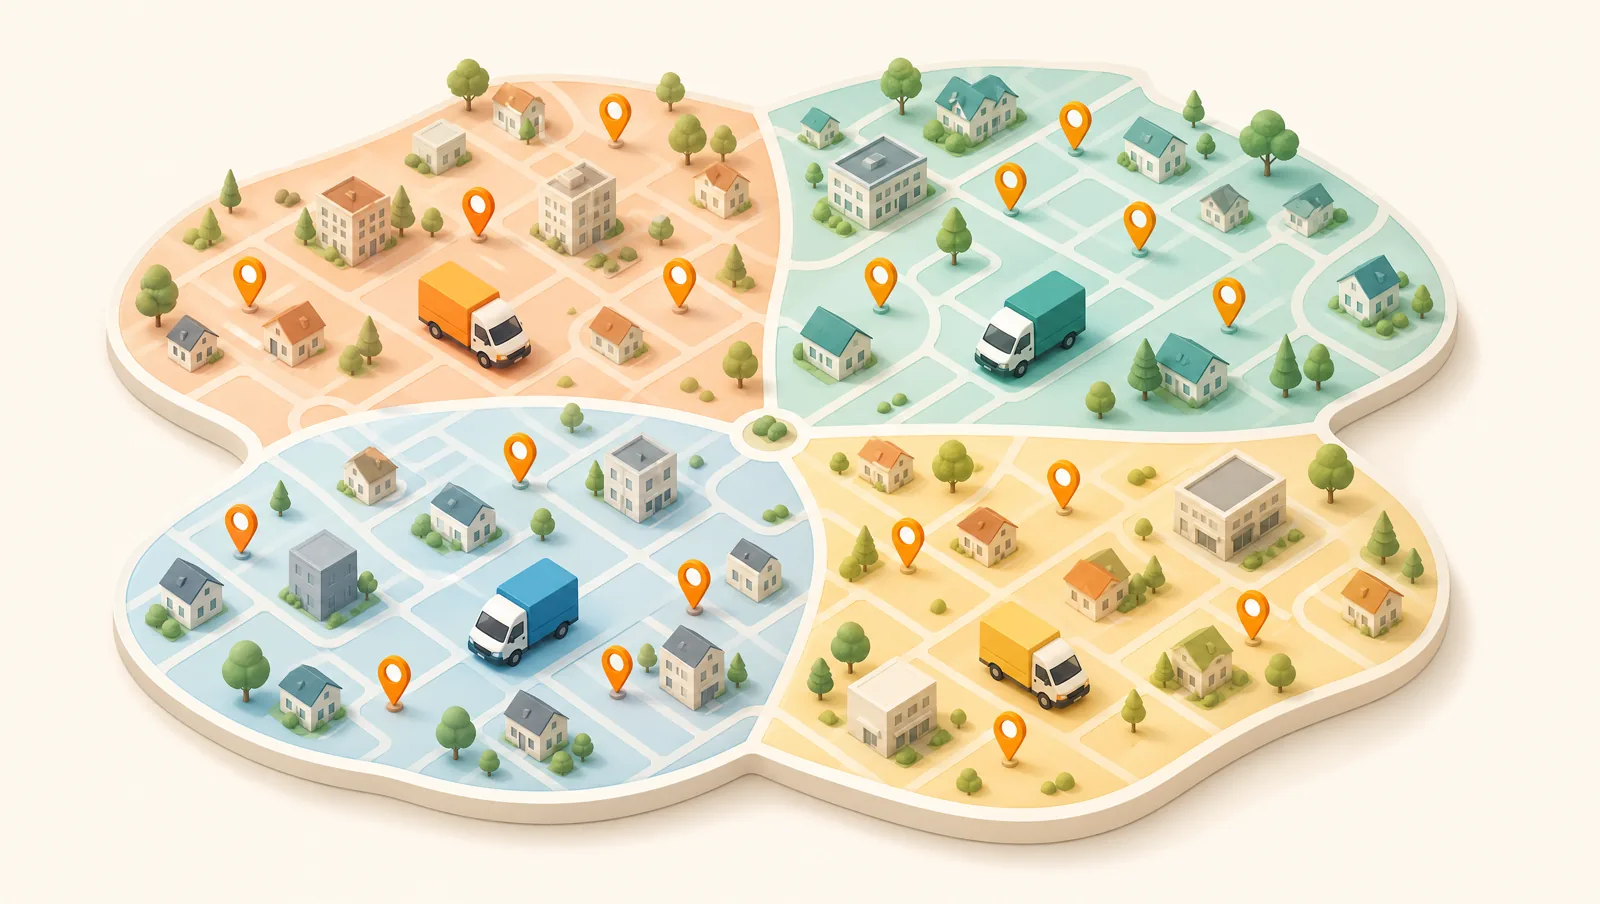
How many delivery zones should you run?
Fewer than you think. For most small fleets, three to six zones per origin is the sweet spot. Too few and a single zone spans wildly different drive times, so you cannot promise a window or assign a driver sensibly. Too many and you drown in micro-zones that fragment your orders, hurt cost per drop, and make dispatch a puzzle every morning. The right number is the smallest set where (a) every order in a zone shares a believable time window, and (b) each zone usually has enough orders to fill a sensible chunk of a route. If a zone is routinely empty, merge it; if one zone alone fills a driver’s whole day, split it.
Should you charge different fees by zone?
Usually yes — because your cost genuinely differs by zone, and a flat fee quietly subsidises your most expensive deliveries with the margin from your cheapest. The clean approach is tiered: free or low-fee for the dense core that is cheap to serve, a modest fee for the mid ring, and a higher fee (or a minimum order value) for the far fringe where a single drop can eat a driver’s hour. Zone-based pricing also nudges demand toward the orders that route well. If you also collect payment on arrival, your zone fee should sit on top of the order total and reconcile cleanly — see our guide to cash on delivery management for keeping those balances straight.
Setting up delivery zones in Routella
Routella has zone management built in, so the design work above turns straight into live rules. You can define a zone three ways and mix them across your map:
- Radius — drop a centre point and set a distance, for the simple dense core you can always serve.
- Polygon — place points on the map to draw a custom shape, so you can trace the drive-time-realistic edge by hand and cut out the barriers a circle would wrongly include.
- District — select named administrative areas, when your boundaries follow neighbourhoods or postal districts your customers already recognise.
Each zone can be tied to a branch or warehouse, so multi-location sellers route every order to its nearest origin, and you can filter the dispatch board by zone to see and batch only what belongs to one area. From there the rest of the delivery day follows on: multi-stop route optimization sequences the stops inside a zone, the time window you promised is graded against the actual arrival on every plan, and the customer gets a live tracking page with the driver and ETA — the whole point of designing the zone around drive time in the first place. The route optimizer is included free on every plan; only the optional live-traffic Smart Routing is an add-on.
Keep zones honest — review them on a schedule
Zones are not a set-and-forget map. Roads change, demand shifts, a new estate goes up, a bridge closes for works, and the zone that was right in spring quietly drifts wrong by autumn. Put a recurring reminder in the calendar — monthly for a busy operation, quarterly for a steadier one — to drop the latest orders onto the map and check the edges. Look for clusters of good orders sitting just outside a boundary (widen), zones full of late or unprofitable stops (tighten), and zones that no longer carry enough volume to justify their own driver (merge). Honest zones are the cheapest way there is to protect both your margin and your on-time rate.
Start with one accurate zone
You do not need a perfect map to start — you need one zone that is true. Pick your busiest origin, draw the area you can genuinely reach inside the window you promise, assign a driver and a fee, and run a week of real deliveries against it. Then widen, split, or price as the data tells you. You can build all of this on Routella’s free plan — no credit card, no time limit — alongside the free route optimizer, driver links, and live tracking. For the wider picture, see our guides to same-day local delivery and, if you sell on Shopify, Shopify local delivery route planning.
Frequently asked questions
Should delivery zones be based on distance or drive time?
Drive time. A radius circle includes addresses your driver cannot reach in time (across rivers, motorways, or barriers) and excludes ones they easily could on a fast road. Designing zones around how far a driver can actually drive within your promised window — a drive-time shape — matches what the customer experiences and protects your on-time rate. A simple radius is fine only as a rough first sketch.
How many delivery zones should a small fleet have?
For most small fleets, three to six zones per origin. Too few and one zone spans wildly different drive times, so you cannot promise a sensible window. Too many and your orders fragment into micro-zones that hurt route density and cost per drop. Aim for the smallest set where every order in a zone shares a believable time window and each zone usually carries enough orders to fill a meaningful chunk of a route.
How do I set up delivery zones in Routella?
Open the Delivery Zones page and create a zone as a radius (a centre point plus a distance), a polygon (points you place on the map to trace a custom drive-time shape), or a district (named administrative areas). Tie each zone to a branch or warehouse so orders route to the nearest origin, set a delivery fee, and filter the dispatch board by zone to batch what belongs together. Routes, time windows, and customer tracking then follow on automatically.
Should I charge different delivery fees for different zones?
Usually yes. Your cost to serve genuinely differs by zone, so a single flat fee subsidises your most expensive deliveries with margin from your cheapest. A tiered fee — free or low for the dense core, higher (or a minimum order value) for the far fringe — recovers the real cost and nudges demand toward the orders that route well.
How often should I review my delivery zones?
Monthly for a busy operation, quarterly for a steadier one. Roads, demand, and barriers change, so drop your latest orders onto the map and check the edges: widen where good orders sit just outside a boundary, tighten zones full of late or unprofitable stops, and merge zones that no longer carry enough volume to justify their own driver.
Run your own deliveries with Routella
Route optimization, a driver app, proof of delivery, and live customer tracking — in one platform. Free plan, no credit card.